Using gdotv on AWS Marketplace (EKS)
gdotv is available as a Kubernetes application on the AWS Marketplace. It is a graph database client, perfect for developers looking to start on a graph project or support an existing one. It is compatible with Amazon Neptune's Gremlin and Cypher API, as well as Apache TinkerPop enabled graph databases such as JanusGraph, Gremlin Server and Aerospike Graph. It is also compatible with Google Cloud Spanner Graph, Dgraph, Oracle Graph and many more graph databases.
We provide state of the art development tools with advanced autocomplete, syntax checking and graph visualization.
With gdotv you can:
- View your graph database's schema in 1 click
- Write and run Gremlin, Cypher, SPARQL, GQL and DQL queries against your database
- Visualize query results across a variety of formats such as graph visualization, JSON and tables
- Explore your data interactively with our no-code graph database browser
- Debug Gremlin queries step by step, and access profiling tools for Gremlin and Cypher
It is deployed on an Amazon EKS cluster via Helm, running five containerized services behind a Network Load Balancer with TLS enabled by default.
Deploying a gdotv instance
There are two ways to deploy gdotv on EKS:
- One-click deploy via CloudFormation - AWS creates the EKS cluster and deploys gdotv automatically. Recommended for first-time deployments.
- Manual deploy via Helm - Deploy into an existing EKS cluster using the Helm chart directly. Recommended when you already have an EKS cluster and want full control over the configuration.
Pricing
gdotv on AWS Marketplace (EKS) is usage-based. Charges are billed through your AWS account via the AWS Marketplace Metering Service. For pricing details, refer to the Marketplace listing page.
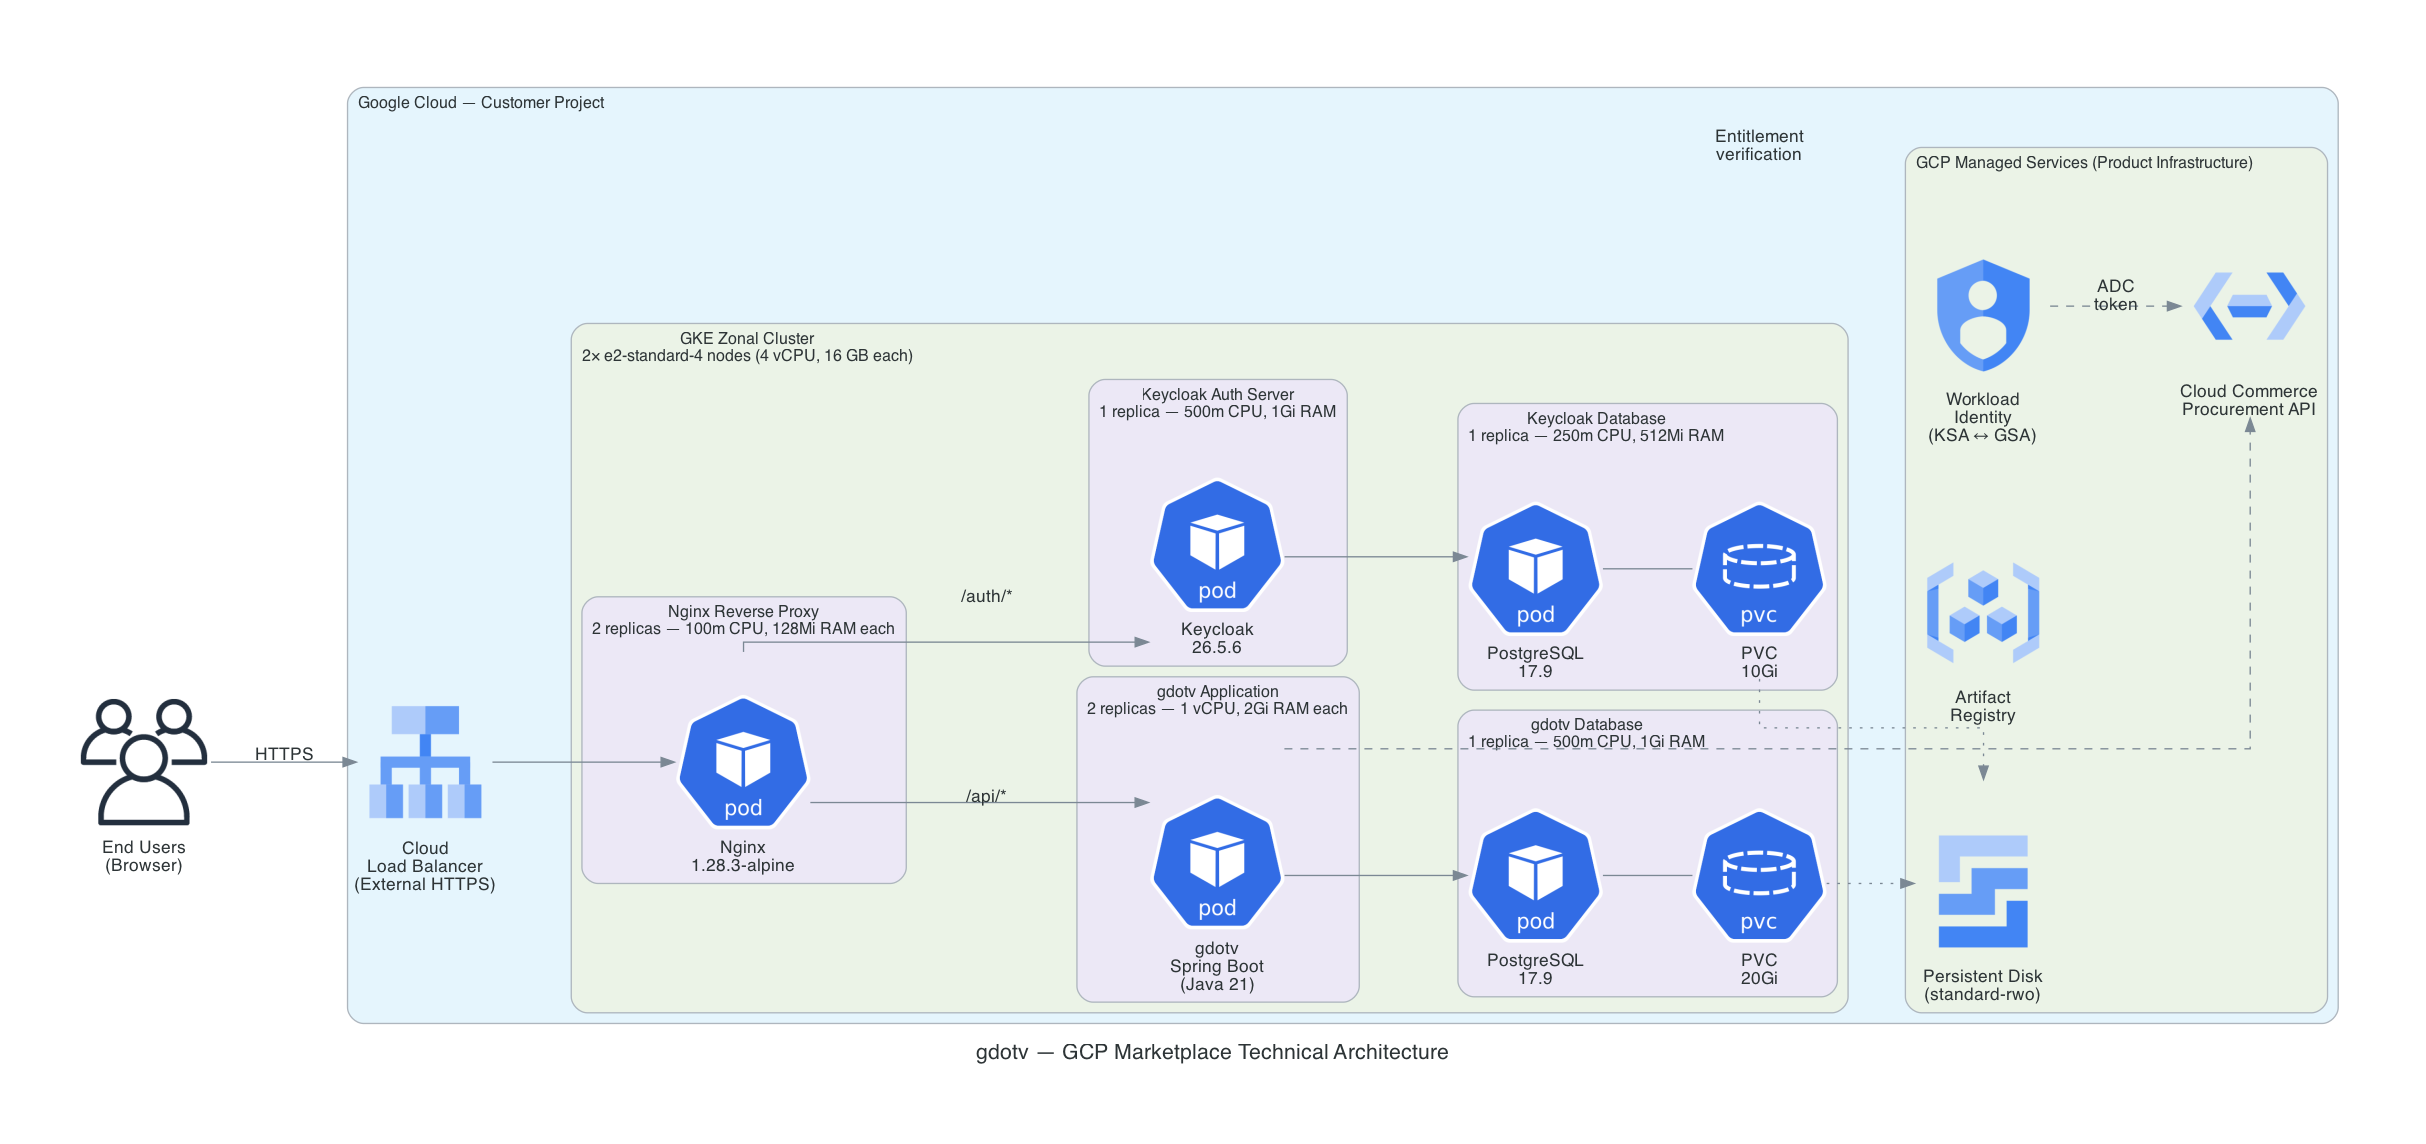
Architecture
gdotv is deployed as a set of Kubernetes workloads on EKS. The deployment includes five containers managed by Helm:
- gdotv-developer: The gdotv web application (Spring Boot + Vue.js)
- gdotv-keycloak: A Keycloak instance providing user authentication, federation and SSO capabilities
- gdotv-postgres: A PostgreSQL database storing gdotv application data
- gdotv-keycloak-postgres: A PostgreSQL database storing Keycloak configuration and realm data
- gdotv-nginx: An NGINX reverse proxy fronting the application over port 443, with TLS enabled by default
The architecture of the application is as shown below:
Sizing
The EKS node group should be provisioned with sufficient resources to run all five containers. The following table provides sizing guidance:
| Node Instance Type | Concurrent Users | Notes |
|---|---|---|
| t3.xlarge | Up to 10 users | Burstable, suitable for evaluation and dev |
| m7i.xlarge | Up to 10 users | Recommended for most teams |
| m7i.2xlarge | Up to 20 users | For larger teams |
| m7i.4xlarge | Over 20 users | For enterprise deployments |
| r7i.xlarge | Up to 10 users | Memory-optimized, for large graph datasets |
| r7i.2xlarge | Up to 20 users | Memory-optimized, for larger teams with large graphs |
| r7i.4xlarge | Over 20 users | Memory-optimized, for enterprise deployments |
The M7i (7th generation Intel) is recommended over the older M5 for better price-performance. The R7i (memory-optimized) is recommended when working with large graph datasets that require more memory per node. The T3 burstable instance type is available for evaluation but not recommended for production due to variable CPU performance. The M5 family is also available for backward compatibility.
By default we provision a 2-node EKS cluster — sufficient for evaluation and most non-HA production workloads. For high availability, raise NodeGroupDesiredSize to 3 or more across multiple availability zones and GdotvReplicaCount to 2 or more.
AWS infrastructure costs
In addition to the gdotv software charge (billed hourly through the AWS Marketplace Metering Service), the CloudFormation stack creates standard AWS resources that are billed to your account at normal AWS rates. The table below is an approximate us-east-1 on-demand estimate for the default configuration (2 × m7i.xlarge nodes, new VPC); actual costs vary by region, instance type, node count, and data transfer:
| AWS resource | Approx. monthly cost (default config) |
|---|---|
| EKS cluster (control plane) | ~$73 |
2 × m7i.xlarge worker nodes (on-demand) | ~$290 |
| NAT Gateway (hourly + data processing) | ~$33 + data |
| Network Load Balancer | ~$16 + LCU |
EBS — node root volumes (2 × NodeDiskSize GB gp3) | ~$16 |
| EBS — gdotv & Keycloak database volumes (gp3) | ~$5 |
| Approximate total | ~$430–450 / month |
You can reduce cost by lowering NodeGroupDesiredSize/NodeInstanceType (see Sizing), using a single AZ, or running on Spot/Savings Plans. For an exact estimate use the AWS Pricing Calculator. The gdotv software charge is separate and shown on the Marketplace listing.
AWS service quotas
The default deployment consumes the following account quotas in the target Region. If a quota is exhausted the stack will fail to create — check and, if needed, raise these in the Service Quotas console (or AWS Support → Create case → Service limit increase):
| Quota | Used by the stack | Typical default |
|---|---|---|
| VPCs per Region | 1 (new VPC mode) | 5 |
| Elastic IP addresses | 1 (for the NAT Gateway) | 5 |
| EKS clusters per Region | 1 | 100 |
| Running On-Demand Standard (A, C, D, H, I, M, R, T, Z) instances (vCPU) | NodeGroupDesiredSize × node vCPUs (default 2 × 4 = 8 vCPU) | varies (often 5–64+) |
| NAT Gateways per AZ | 1 | 5 |
For details on viewing and requesting increases, see AWS service quotas.
One-click deploy via CloudFormation
The CloudFormation stack creates a complete EKS environment - VPC, cluster, node group, EBS CSI driver - and deploys gdotv automatically. No prior Kubernetes experience is required.
Accept the Marketplace agreement first
Before launching the stack, you must subscribe to gdotv on the AWS Marketplace and accept the terms. Navigate to the gdotv AWS Marketplace listing, click View purchase options, and accept the terms. The CloudFormation deployment will fail if this step is skipped.
Or deploy manually via the AWS CLI:
aws cloudformation create-stack \
  --stack-name gdotv \
  --template-url https://gdotv-cloudformation.s3.amazonaws.com/gdotv-eks.yaml \
  --capabilities CAPABILITY_IAM \
  --region <your-region> \
  --parameters \
    ParameterKey=ClusterName,ParameterValue=gdotv-eks \
    ParameterKey=NodeInstanceType,ParameterValue=m7i.xlarge \
    ParameterKey=NodeGroupDesiredSize,ParameterValue=2
Parameters
| Parameter | Default | Description |
|---|---|---|
ClusterName | gdotv-eks | Name of the EKS cluster |
KubernetesVersion | 1.35 | Kubernetes version |
NodeInstanceType | m7i.xlarge | EC2 instance type for worker nodes |
NodeGroupDesiredSize | 2 | Initial number of worker nodes |
NodeGroupMinSize | 1 | Minimum number of nodes (autoscaling) |
NodeGroupMaxSize | 6 | Maximum number of nodes (autoscaling) |
NodeDiskSize | 100 | EBS volume size in GB per node |
Hostname | (empty) | Custom hostname (leave empty to auto-detect the NLB hostname) |
GdotvReplicaCount | 1 | Number of gdotv application replicas (raise for HA) |
ExistingVpcId | (empty) | ID of an existing VPC. Leave empty to create a new one |
ExistingPublicSubnet1Id | (empty) | Existing public subnet in AZ 1 (required if using existing VPC) |
ExistingPublicSubnet2Id | (empty) | Existing public subnet in AZ 2 (required if using existing VPC) |
ExistingPrivateSubnet1Id | (empty) | Existing private subnet in AZ 1 (required if using existing VPC) |
ExistingPrivateSubnet2Id | (empty) | Existing private subnet in AZ 2 (required if using existing VPC) |
What the stack creates
Infrastructure resources:
- VPC with public and private subnets across two availability zones (or reuses an existing one when the
ExistingVpcId/subnet parameters are supplied) - NAT Gateway for outbound internet access from the private subnets (lets worker nodes pull container images and reach the AWS Marketplace Metering Service)
- EKS cluster with a managed node group (the worker nodes that run the gdotv workloads)
- OIDC provider enabling IAM Roles for Service Accounts (IRSA)
- EBS CSI driver add-on for dynamic persistent-volume provisioning
- Network Load Balancer (provisioned by the in-cluster NGINX
Service) exposing gdotv over HTTPS (443) - A temporary EC2 deployer instance that runs
helm install, generates credentials and the TLS certificate, then signals CloudFormation and is terminated on completion
IAM roles and policies created by the template (each scoped to a single purpose):
| IAM role | Attached policies | Purpose |
|---|---|---|
<ClusterName>-cluster-role | AmazonEKSClusterPolicy, AmazonEKSVPCResourceController | Lets the EKS control plane manage cluster resources and ENIs |
<ClusterName>-node-role | AmazonEKSWorkerNodePolicy, AmazonEKS_CNI_Policy, AmazonEC2ContainerRegistryReadOnly | Assumed by worker nodes — node registration, VPC CNI networking, and read-only pull from ECR |
<ClusterName>-deployer-role | AmazonEKSClusterPolicy, AmazonEC2ContainerRegistryReadOnly + inline EKSDeployerAccess + EKS cluster-admin access entry | Assumed by the temporary deployer EC2 instance to create the cluster access entry, describe the cluster, and run helm install. The instance and role are only used during deployment |
<ClusterName>-ebs-csi-role | service-role/AmazonEBSCSIDriverPolicy (IRSA) | Lets the EBS CSI driver create/attach/delete EBS volumes for PersistentVolumeClaims |
<ClusterName>-gdotv-metering-role | inline MarketplaceMeteringAccess: aws-marketplace:RegisterUsage, aws-marketplace:MeterUsage (IRSA) | Bound to the gdotv-developer Kubernetes service account so the app can verify the Marketplace entitlement and emit hourly usage records |
No KMS keys are created by the template. The only cryptographic material it generates is the TLS certificate and the application/database passwords described under Security and data storage.
Deployment duration
- New VPC + new cluster: approximately 20–30 minutes
- Existing VPC + new cluster: approximately 15–20 minutes
Retrieving credentials after deployment
Once the stack reaches CREATE_COMPLETE, the access URL and initial passwords are published directly as stack outputs — the simplest way to retrieve them:
aws cloudformation describe-stacks --stack-name gdotv --region <your-region> \
  --query 'Stacks[0].Outputs' --output table
This returns:
| Output | Contents |
|---|---|
AccessUrl | The HTTPS URL of your gdotv instance (the Network Load Balancer hostname) |
GdotvUserPassword | Initial password for the default gdotv application user |
KeycloakAdminPassword | Password for the Keycloak master realm admin |
GdotvAccessInstructions | A short reminder of how to log in |
Treat these outputs as secrets
The passwords are visible to anyone with cloudformation:DescribeStacks permission on the stack. Rotate them after first login (see Rotating credentials and certificates) and restrict access to the stack.
Alternatively, the same values are written to the deployer instance log, which you can read over SSM:
INSTANCE_ID=$(aws cloudformation describe-stack-resource \
  --stack-name gdotv \
  --logical-resource-id DeployerInstance \
  --query 'StackResourceDetail.PhysicalResourceId' \
  --output text)

aws ssm start-session \
  --target "$INSTANCE_ID" \
  --document-name AWS-StartNonInteractiveCommand \
  --parameters 'command=["cat /var/log/gdotv-deploy.log"]'
Manual deploy via Helm
Use this method to deploy gdotv into an existing EKS cluster.
Prerequisites
Install the following CLI tools if you haven't already:
Step 1 - Configure kubectl
aws eks update-kubeconfig --name <CLUSTER_NAME> --region <REGION>
kubectl get nodes  # verify connectivity
Step 2 - Create the IRSA role
The gdotv pod must call the AWS Marketplace Metering API to validate its license (RegisterUsage) and report hourly usage (MeterUsage). This requires an IAM role bound to the Kubernetes service account via IRSA. The managed policy below grants both actions.
WARNING
EKS Pod Identity is not supported by the AWS Marketplace Metering API. IRSA is required.
2a - Ensure your cluster has an OIDC provider:
eksctl utils associate-iam-oidc-provider \
  --cluster <CLUSTER_NAME> \
  --region <REGION> \
  --approve
2b - Create the IAM role and attach the metering policy:
eksctl create iamserviceaccount \
  --cluster <CLUSTER_NAME> \
  --region <REGION> \
  --namespace gdotv \
  --name gdotv-developer \
  --attach-policy-arn arn:aws:iam::aws:policy/AWSMarketplaceMeteringRegisterUsage \
  --approve \
  --override-existing-serviceaccounts
This creates an IAM role with the aws-marketplace:RegisterUsage and aws-marketplace:MeterUsage permissions and annotates the gdotv-developer Kubernetes service account in the gdotv namespace with the role ARN.
Note the role ARN output - you will need it in the next step:
ROLE_ARN=$(aws iam list-roles \
  --query "Roles[?contains(RoleName, 'gdotv')].Arn" \
  --output text)
echo "$ROLE_ARN"
Step 3 - Add Amazon Neptune IAM permissions (optional)
If you plan to connect gdotv to Amazon Neptune with IAM authentication enabled, add the necessary Neptune permissions to the role created above. We recommend using the following fine-grained inline policy rather than NeptuneFullAccess:
{
    "Version": "2012-10-17",
    "Statement": [
        {
            "Sid": "AllowPassRoleForNeptune",
            "Effect": "Allow",
            "Action": "iam:PassRole",
            "Resource": "*",
            "Condition": {
                "StringEquals": {
                    "iam:passedToService": "rds.amazonaws.com"
                }
            }
        },
        {
            "Sid": "AllowDataAccessForNeptune",
            "Effect": "Allow",
            "Action": [
                "neptune-db:*",
                "neptune-graph:*"
            ],
            "Resource": [
                "<ENTER COMMA SEPARATED LIST OF AMAZON NEPTUNE ARNs>"
            ]
        }
    ]
}
TIP
You can find your Amazon Neptune DB cluster ARN or Neptune Analytics graph ARN from the Neptune console under the Configuration section.
ARN formats:
arn:aws:rds:{region}:{account}:cluster:{cluster-name}(Amazon Neptune)arn:aws:neptune-graph:{region}:{account}:graph/{graph-id}(Amazon Neptune Analytics)
To grant access to all Neptune resources, use "Resource": ["*"]. We recommend following the principle of least privilege.
You can optionally also add CloudWatchLogsReadOnlyAccess to enable our Slow Query and Audit Logs functionality.
Step 4 - Authenticate Helm with ECR
aws ecr get-login-password --region us-east-1 \
  | helm registry login \
    --username AWS \
    --password-stdin \
    709825985650.dkr.ecr.us-east-1.amazonaws.com
Step 5 - Install the Helm chart
helm upgrade --install gdotv-developer \
  oci://709825985650.dkr.ecr.us-east-1.amazonaws.com/gdotv/gdotv-developer \
  --version <CHART_VERSION> \
  --create-namespace \
  --namespace gdotv \
  --set gdotv.env.licensingMode="aws-marketplace-eks" \
  --set gdotv.env.deploymentMode="eks" \
  --set gdotv.env.awsMarketplaceProductCode="akyagndqcrxxwssbchcyjon9i" \
  --set gdotv.env.awsRegion="<REGION>" \
  --set serviceAccount.roleArn="$ROLE_ARN" \
  --set gdotvPostgres.auth.password="$(openssl rand -base64 24 | tr -d '/+=')" \
  --set keycloakPostgres.auth.password="$(openssl rand -base64 24 | tr -d '/+=')" \
  --set keycloak.auth.adminPassword="$(openssl rand -base64 24 | tr -d '/+=')" \
  --set keycloak.client.secret="$(openssl rand -base64 32 | tr -d '/+=')" \
  --set gdotv.bootstrap.defaultUserPassword="$(openssl rand -base64 24 | tr -d '/+=')" \
  --set gdotvPostgres.persistence.storageClass="gp3" \
  --set keycloakPostgres.persistence.storageClass="gp3" \
  --set nginx.service.annotations."service\.beta\.kubernetes\.io/aws-load-balancer-type"="nlb" \
  --set nginx.service.annotations."service\.beta\.kubernetes\.io/aws-load-balancer-scheme"="internet-facing" \
  --set gdotv.env.hostname="<YOUR_HOSTNAME_OR_LEAVE_EMPTY>"
TIP
The gp3 storage class requires the EBS CSI driver add-on. If it is not installed on your cluster, run:
eksctl create addon --name aws-ebs-csi-driver --cluster <CLUSTER_NAME> --region <REGION>Once deployed, retrieve the initial passwords from the Kubernetes secrets:
# gdotv user password
kubectl get secret gdotv-developer-gdotv-secrets \
  -n gdotv \
  -o jsonpath='{.data.gdotv-user-password}' | base64 -d

# Keycloak admin password
kubectl get secret gdotv-developer-keycloak-secrets \
  -n gdotv \
  -o jsonpath='{.data.admin-password}' | base64 -d
Connecting to your EKS cluster
To run kubectl or helm commands against your gdotv deployment, authenticate to the EKS cluster first.
aws eks update-kubeconfig --name <CLUSTER_NAME> --region <REGION>
kubectl get pods -n gdotv
You should see the gdotv pods listed with their status.
Accessing gdotv
Once the deployment is complete, find the NLB hostname assigned to the LoadBalancer service:
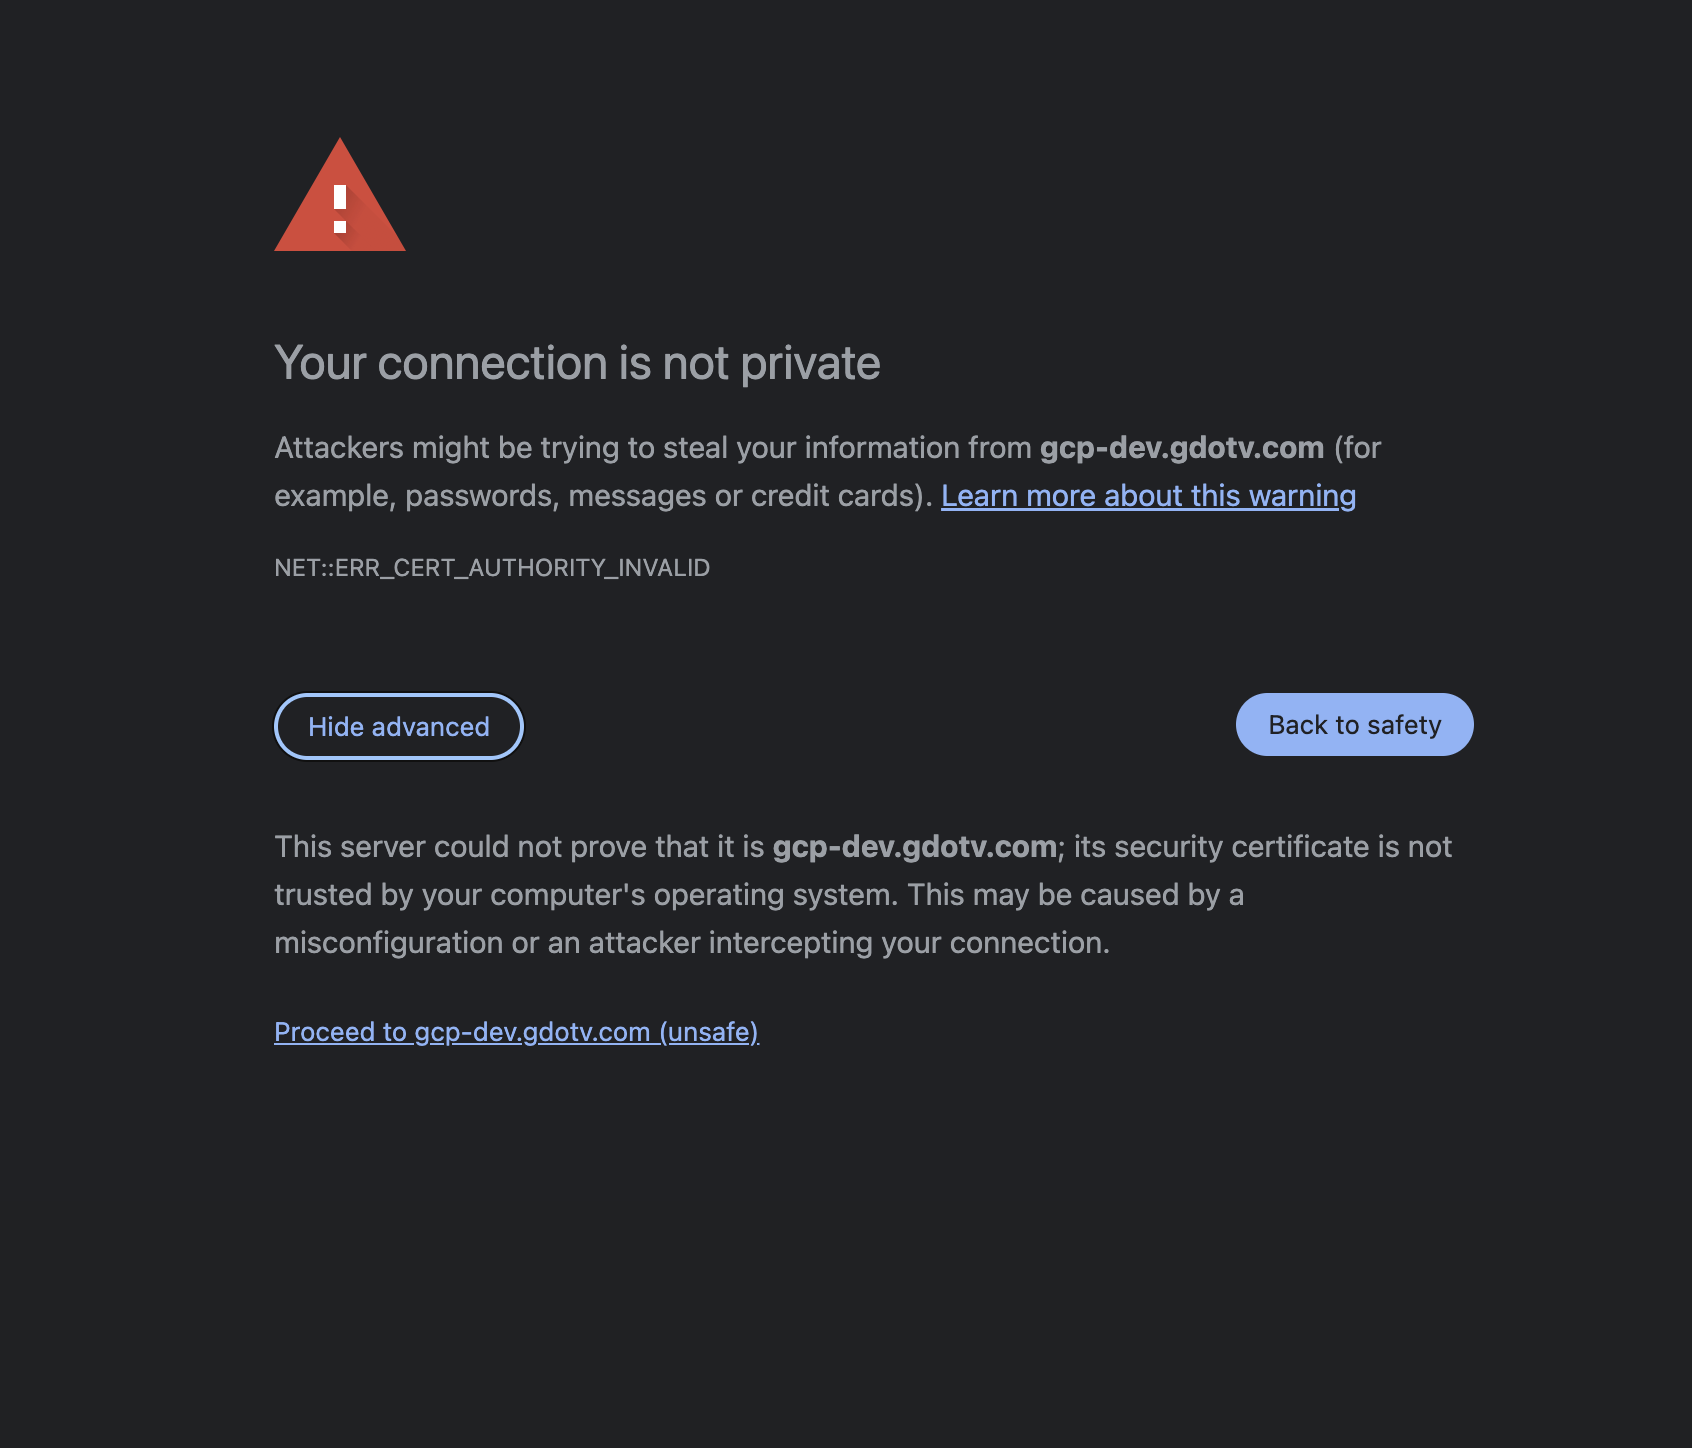
kubectl get svc -n gdotv -l app.kubernetes.io/component=nginxNavigate to https://<NLB_HOSTNAME> in your browser. Since gdotv uses a self-signed TLS certificate by default, you will see a browser warning. Click Advanced, then Proceed to continue.
Authenticating to gdotv
First-time login
gdotv uses Keycloak for authentication. On first deployment, a default user is created automatically:
- Username:
gdotv - Password: Auto-generated during deployment
To retrieve the default user password:
kubectl get secret gdotv-developer-gdotv-secrets \
  -n gdotv \
  -o jsonpath='{.data.gdotv-user-password}' | base64 -d
When navigating to gdotv while unauthenticated, you will be presented with the Keycloak login screen:
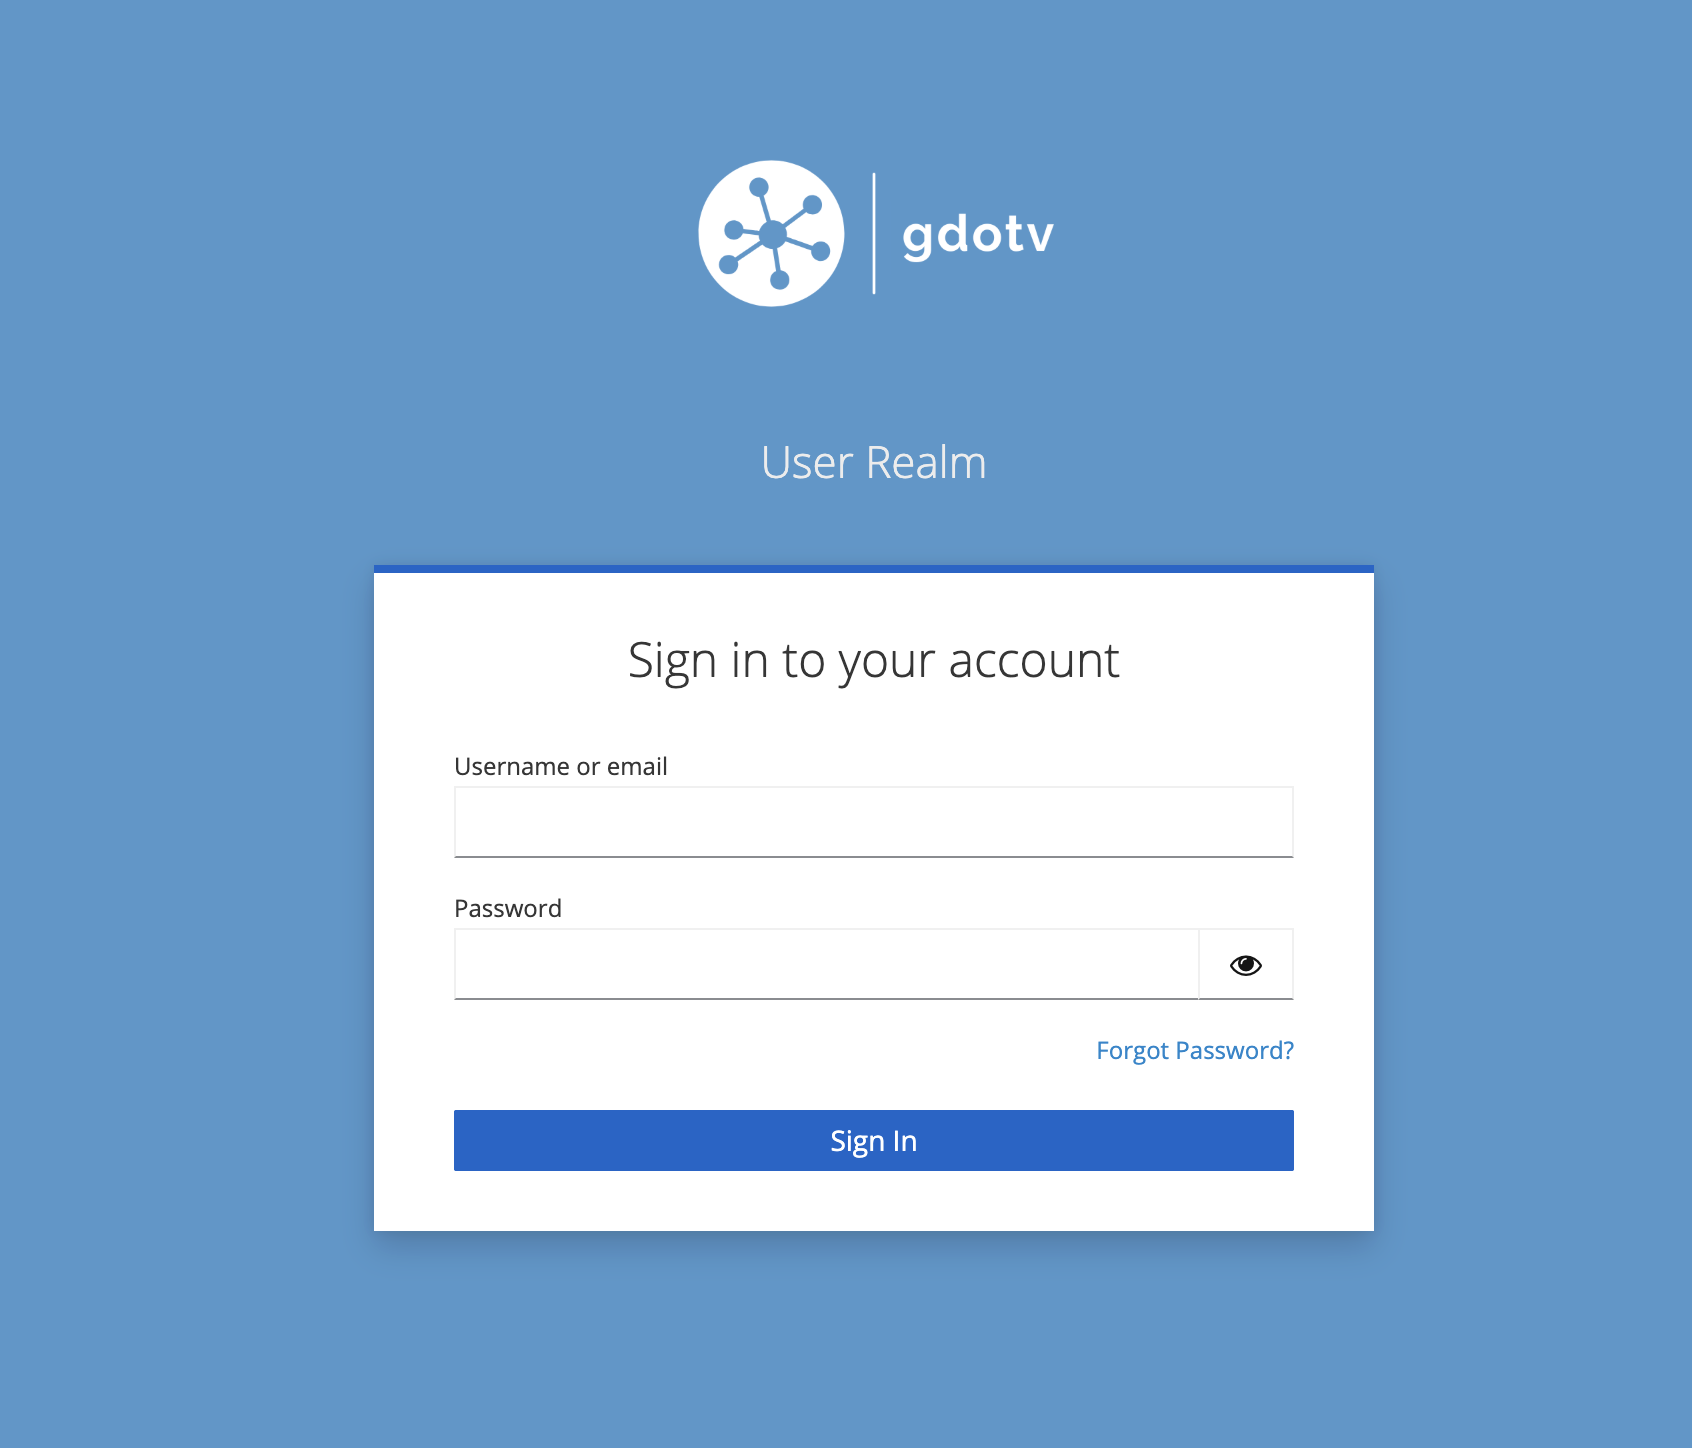
We recommend changing the default password after your first login. To do so, click on the username in the top-right menu bar, then select Change Password. You will be redirected to the Keycloak profile management page where you can update your password.
Authenticating to the gdotv Keycloak realm
The gdotv Keycloak realm is where all gdotv users are stored and managed. New authentication flows, such as Single Sign On, can be configured from the gdotv Keycloak realm admin console.
The gdotv Keycloak realm admin console can be accessed at:
https://<HOSTNAME>/kc/admin/gdotv/console/The default realm admin credentials are:
- Username:
gdotv - Password: Same as the default gdotv user password (see above)
Authenticating to the master Keycloak realm
The master Keycloak realm provides access to the master administration interface of Keycloak. Under normal circumstances, it should rarely need to be accessed. However, we recommend logging in after initial deployment to change the master admin password.
The master Keycloak realm admin console can be accessed at:
https://<HOSTNAME>/kc/admin/master/console/To retrieve the Keycloak admin credentials:
kubectl get secret gdotv-developer-keycloak-secrets \
  -n gdotv \
  -o jsonpath='{.data.admin-password}' | base64 -d
The default master admin username is admin.
Configuring a TLS certificate
By default, gdotv uses a self-signed certificate to serve its web interface over HTTPS. You may wish to configure your own trusted certificate against a domain name that you own.
WARNING
When changing the hostname, you must also update the TLS certificate in the same helm upgrade command. Running separate helm upgrade commands will cause values to be overwritten due to how --reuse-values works.
Renewing or replacing the certificate for the current hostname
HOSTNAME="<your-current-hostname>"

# Generate a self-signed certificate (or use your CA-issued .crt and .key files)
openssl req -x509 -nodes -days 3650 -newkey rsa:2048 \
  -keyout tls.key \
  -out tls.crt \
  -subj "/CN=gdotv/O=gdotv" \
  -addext "subjectAltName=DNS:${HOSTNAME}"

TLS_CRT=$(base64 -w0 tls.crt)
TLS_KEY=$(base64 -w0 tls.key)

helm upgrade gdotv-developer \
  oci://709825985650.dkr.ecr.us-east-1.amazonaws.com/gdotv/gdotv-developer \
  --namespace gdotv \
  --reuse-values \
  --wait \
  --set nginx.tls.certificate="$TLS_CRT" \
  --set nginx.tls.privateKey="$TLS_KEY"

kubectl rollout restart deployment/gdotv-developer-nginx -n gdotv
Confirm the new certificate is active:
echo | openssl s_client -connect <HOSTNAME>:443 2>/dev/null | openssl x509 -noout -datesUsing a Kubernetes TLS secret
Alternatively, you can store your certificate as a Kubernetes TLS secret:
kubectl create secret tls my-tls-cert \
  -n gdotv \
  --cert=path/to/tls.crt \
  --key=path/to/tls.key

helm upgrade gdotv-developer \
  oci://709825985650.dkr.ecr.us-east-1.amazonaws.com/gdotv/gdotv-developer \
  --namespace gdotv \
  --reuse-values \
  --wait \
  --set nginx.tls.existingSecret=my-tls-cert

kubectl rollout restart deployment/gdotv-developer-nginx -n gdotv
Reverting to the default self-signed certificate
# Get the current NLB hostname
NLB=$(kubectl get svc gdotv-developer-nginx -n gdotv \
  -o jsonpath='{.status.loadBalancer.ingress[0].hostname}')

# Generate a self-signed certificate for the NLB hostname
openssl req -x509 -nodes -days 365 -newkey rsa:2048 \
  -keyout tls.key -out tls.crt \
  -subj "/CN=gdotv" \
  -addext "subjectAltName=DNS:${NLB}"

TLS_CRT=$(base64 -w0 tls.crt)
TLS_KEY=$(base64 -w0 tls.key)

helm upgrade gdotv-developer \
  oci://709825985650.dkr.ecr.us-east-1.amazonaws.com/gdotv/gdotv-developer \
  --namespace gdotv \
  --reuse-values \
  --wait \
  --set gdotv.env.hostname="$NLB" \
  --set nginx.tls.existingSecret="" \
  --set nginx.tls.certificate="$TLS_CRT" \
  --set nginx.tls.privateKey="$TLS_KEY"

kubectl rollout restart deployment/gdotv-developer-keycloak -n gdotv
kubectl rollout restart deployment/gdotv-developer -n gdotv
kubectl rollout restart deployment/gdotv-developer-nginx -n gdotv
Configuring a custom hostname
If you deployed gdotv without a hostname (using the auto-detected NLB hostname) and later want to configure a custom domain:
TIP
If you have an active session on the old hostname, your browser may have cached session data that causes redirects to the old address. We recommend logging out of gdotv before changing the hostname, or testing the new hostname in a private/incognito browser window.
Hostname and TLS certificate persistence
When gdotv auto-detects the NLB hostname during deployment, the hostname is persisted in a Kubernetes ConfigMap and the TLS certificate in a Kubernetes Secret. A post-install/post-upgrade Job owns both values via Kubernetes Server-Side Apply, which means:
- Hostname survives pod restarts, node scaling events, and
helm upgrade - The TLS certificate is reused across upgrades (same serial number, same SAN) as long as the NLB hostname does not change — clients that pinned the certificate continue to trust it
- You can safely update your deployment (e.g. to pick up a new gdotv application version) without losing the auto-detected hostname or regenerating the certificate
Changing from auto-detected to custom hostname
- Fetch the NLB hostname of your gdotv deployment:
kubectl get svc gdotv-developer-nginx -n gdotv \
  -o jsonpath='{.status.loadBalancer.ingress[0].hostname}'
Create a DNS CNAME record on your domain manager, pointing your domain (e.g.
gdotv.example.com) to the NLB hostname.Transfer ownership of the Job-managed fields from the hostname-detect Job back to Helm. While auto-detect was enabled, the hostname-detect Job owned
.spec.replicason both Deployments and the.data(TLS cert) plusgdotv.com/tls-hostnameannotation on thegdotv-developer-tlsSecret, all via Kubernetes Server-Side Apply. When you disable auto-detect, Helm needs to take ownership of these fields — but the upgrade will fail with an SSA conflict unless the Job's prior ownership record is removed first:
# Strip Job ownership from Deployments
for dep in gdotv-developer gdotv-developer-nginx; do
  kubectl -n gdotv get deploy $dep --show-managed-fields -o json \
    | jq '.metadata.managedFields |= map(select(.manager != "gdotv-hostname-detect"))' \
    > /tmp/${dep}-stripped.json
  kubectl replace --raw "/apis/apps/v1/namespaces/gdotv/deployments/$dep" \
    -f /tmp/${dep}-stripped.json
done

# Strip Job ownership from the TLS Secret
kubectl -n gdotv get secret gdotv-developer-tls --show-managed-fields -o json \
  | jq '.metadata.managedFields |= map(select(.manager != "gdotv-hostname-detect"))' \
  > /tmp/gdotv-developer-tls-stripped.json
kubectl replace --raw "/api/v1/namespaces/gdotv/secrets/gdotv-developer-tls" \
  -f /tmp/gdotv-developer-tls-stripped.json
Note: --show-managed-fields is required on kubectl 1.30+ — the flag defaults to omitting .metadata.managedFields from -o json output, which would make the jq filter a no-op.
This one-time cleanup is only needed on the autodetect → static-hostname transition. It does not affect running pods or the certificate currently in use; it only rewrites the bookkeeping metadata that Kubernetes uses to resolve SSA ownership conflicts.
- Update the hostname and TLS certificate together in a single
helm upgradecommand. Disable hostname auto-detection so that gdotv and Keycloak use your custom hostname instead of the auto-detected one:
With a self-signed certificate:
HOSTNAME="gdotv.example.com"

openssl req -x509 -nodes -days 3650 -newkey rsa:2048 \
  -keyout tls.key -out tls.crt \
  -subj "/CN=gdotv/O=gdotv" \
  -addext "subjectAltName=DNS:${HOSTNAME}"

TLS_CRT=$(base64 -w0 tls.crt)
TLS_KEY=$(base64 -w0 tls.key)

helm upgrade gdotv-developer \
  oci://709825985650.dkr.ecr.us-east-1.amazonaws.com/gdotv/gdotv-developer \
  --namespace gdotv \
  --reuse-values \
  --wait \
  --set gdotv.hostnameDetect.enabled=false \
  --set gdotv.env.hostname="$HOSTNAME" \
  --set nginx.tls.certificate="$TLS_CRT" \
  --set nginx.tls.privateKey="$TLS_KEY"
With a Kubernetes TLS secret:
kubectl create secret tls my-tls-cert \
  -n gdotv \
  --cert=path/to/tls.crt \
  --key=path/to/tls.key

helm upgrade gdotv-developer \
  oci://709825985650.dkr.ecr.us-east-1.amazonaws.com/gdotv/gdotv-developer \
  --namespace gdotv \
  --reuse-values \
  --wait \
  --set gdotv.hostnameDetect.enabled=false \
  --set gdotv.env.hostname=gdotv.example.com \
--set nginx.tls.existingSecret=my-tls-cert- Restart all services to pick up the changes (Keycloak first, then gdotv):
kubectl rollout restart deployment/gdotv-developer-keycloak -n gdotv
kubectl rollout restart deployment/gdotv-developer -n gdotv
kubectl rollout restart deployment/gdotv-developer-nginx -n gdotv
Security and data storage
Where your sensitive data is stored. All data stays inside the cluster's encrypted volumes — nothing is written to an external service:
- Graph database connection configurations and the credentials you enter for them are stored in the gdotv PostgreSQL database (
gdotv-postgres) on a persistent EBS volume. - User accounts, passwords, sessions and SSO configuration are managed by Keycloak and stored in the Keycloak PostgreSQL database (
keycloak-postgres) on a persistent EBS volume. - Both databases run inside the cluster in the
gdotvnamespace and are not exposed outside it.
Generated secrets and where they live. The deployer generates a unique set of credentials per deployment, stored as Kubernetes Secrets in the gdotv namespace (list with kubectl get secrets -n gdotv):
| Secret | Purpose | Also surfaced as |
|---|---|---|
| gdotv user password | Initial login for the default gdotv application user | CFN output GdotvUserPassword |
| Keycloak admin password | Keycloak master realm administrator | CFN output KeycloakAdminPassword |
| Keycloak client secret | OIDC client secret between gdotv and Keycloak | — |
| gdotv-postgres / keycloak-postgres passwords | Database authentication | — |
| TLS certificate + private key | HTTPS termination at the Network Load Balancer | — |
Restrict access to the EKS cluster and to the CloudFormation stack (the initial passwords appear in stack outputs), and rotate the initial credentials after first login.
Data encryption
- In transit: all browser-to-application traffic is HTTPS, terminated by NGINX at the Network Load Balancer. A self-signed certificate is generated by default; supply your own via Configuring a TLS certificate.
- At rest: all PersistentVolumeClaim data — both PostgreSQL databases — is stored on encrypted Amazon EBS volumes. The gp3
StorageClasscreated by the stack setsencrypted: true, so volumes are encrypted with the account's default AWS-managed EBS KMS key. Amazon EKS additionally encrypts Kubernetes Secrets and the etcd datastore at rest with AWS-managed keys.
Rotating credentials and certificates
Rotate the auto-generated credentials after deployment and on your normal schedule:
- gdotv application user password — sign in to gdotv, or use the Keycloak admin console (the gdotv realm) to reset the user's password.
- Keycloak admin password — sign in to the Keycloak
masterrealm (see Authenticating to the master Keycloak realm) and update the admin user. - Database passwords — update the corresponding Kubernetes Secret in the
gdotvnamespace and restart the affected StatefulSet (kubectl rollout restart statefulset/<name> -n gdotv), keeping the database and its secret in sync. - TLS certificate — renew before expiry following Renewing or replacing the certificate for the current hostname. The default self-signed certificate has a limited lifetime; supply a CA-issued certificate for production.
Monitoring application health
After deployment, confirm the instance is healthy and monitor it over time:
# 1. All pods should be Running (gdotv, keycloak, both postgres, nginx)
kubectl get pods -n gdotv

# 2. The gdotv application reports readiness on its health endpoint
kubectl exec -n gdotv deploy/gdotv-developer -- \
  curl -sf http://localhost:8080/api/application/is_ready && echo "  gdotv ready"

# 3. The application is reachable over HTTPS at the AccessUrl from the stack outputs
curl -kIs https://<AccessUrl> | head -1   # expect: HTTP/... 200 (or a redirect to login)
A healthy deployment shows every pod Running/Completed, the readiness check returning success, and the AccessUrl serving the login page. For logs and failure diagnosis, see Check Logs and Troubleshooting. To watch pod-level events: kubectl get events -n gdotv --sort-by=.lastTimestamp.
Upgrading to a new version
gdotv receives frequent updates with new features and improvements. Upgrading only updates the gdotv application container - Keycloak, nginx and the databases are unaffected.
First, authenticate Helm with ECR (tokens expire after 12 hours):
aws ecr get-login-password --region us-east-1 \
  | helm registry login \
    --username AWS \
    --password-stdin \
    709825985650.dkr.ecr.us-east-1.amazonaws.com
Then upgrade:
helm upgrade gdotv-developer \
  oci://709825985650.dkr.ecr.us-east-1.amazonaws.com/gdotv/gdotv-developer \
  --namespace gdotv \
  --reuse-values \
  --wait \
  --set gdotv.image.tag=<NEW_VERSION>
--reuse-values preserves all previously set values (passwords, hostname, certificates) so they do not need to be passed again.
Monitor the rollout:
kubectl rollout status deployment/gdotv-developer -n gdotvIf the new version fails to start, roll back to the previous release:
helm rollback gdotv-developer -n gdotvBackup and Restore
Recommended: AWS Backup for EKS
For production deployments, we recommend using AWS Backup, which supports EKS namespace-level backups including persistent volume data.
To set up AWS Backup for EKS:
- Enable the EKS backup feature and install the Velero-based agent on your cluster:
aws eks create-addon \
  --cluster-name <CLUSTER_NAME> \
  --addon-name aws-efs-csi-driver \
--region <REGION>- Create a backup vault and backup plan targeting the
gdotvnamespace via the AWS Backup console. Refer to the AWS Backup for EKS documentation for full steps.
Manual backup with pg_dump
For one-off backups, you can back up the PostgreSQL databases directly. gdotv uses two PostgreSQL instances: one for the application and one for Keycloak.
Back up the gdotv application database:
kubectl exec -n gdotv statefulset/gdotv-developer-gdotv-postgres -- \
  pg_dump -U postgres --clean --if-exists postgres \
  > gdotv-backup-$(date +%Y%m%d-%H%M%S).sql
Back up the Keycloak database:
kubectl exec -n gdotv statefulset/gdotv-developer-keycloak-postgres -- \
  pg_dump -U postgres --clean --if-exists postgres \
  > keycloak-backup-$(date +%Y%m%d-%H%M%S).sql
Restore the gdotv application database:
WARNING
Restoring overwrites current data. Stop the dependent application pod first to avoid write conflicts.
kubectl patch deployment/gdotv-developer -n gdotv \
  --field-manager=gdotv-hostname-detect --type=merge \
  -p '{"spec":{"replicas":0}}'

cat gdotv-backup-<timestamp>.sql | kubectl exec -i -n gdotv \
  statefulset/gdotv-developer-gdotv-postgres -- \
  psql -U postgres postgres

kubectl patch deployment/gdotv-developer -n gdotv \
  --field-manager=gdotv-hostname-detect --type=merge \
  -p '{"spec":{"replicas":1}}'
Restore the Keycloak database:
kubectl scale deployment/gdotv-developer-keycloak -n gdotv --replicas=0

cat keycloak-backup-<timestamp>.sql | kubectl exec -i -n gdotv \
  statefulset/gdotv-developer-keycloak-postgres -- \
  psql -U postgres postgres

kubectl scale deployment/gdotv-developer-keycloak -n gdotv --replicas=1
Stop / Start Services
WARNING
In auto-detect hostname mode (the default on AWS Marketplace deployments), the gdotv-developer and gdotv-developer-nginx Deployment replica counts are owned by the hostname-detect Job via Server-Side Apply. Using plain kubectl scale on these two Deployments will register the default kubectl field manager as a new owner, which causes a conflict the next time the Job runs (e.g. on the next helm upgrade). Use kubectl patch with a matching field manager instead, as shown below.
Stop all services (scale to zero)
This preserves PVCs and Secrets - data is not lost.
kubectl patch deployment/gdotv-developer -n gdotv \
  --field-manager=gdotv-hostname-detect --type=merge \
  -p '{"spec":{"replicas":0}}'
kubectl patch deployment/gdotv-developer-nginx -n gdotv \
  --field-manager=gdotv-hostname-detect --type=merge \
  -p '{"spec":{"replicas":0}}'
kubectl scale deployment/gdotv-developer-keycloak -n gdotv --replicas=0
kubectl scale statefulset/gdotv-developer-gdotv-postgres -n gdotv --replicas=0
kubectl scale statefulset/gdotv-developer-keycloak-postgres -n gdotv --replicas=0
Start all services
Start order matters: databases first, then Keycloak, then gdotv, then nginx.
kubectl scale statefulset/gdotv-developer-gdotv-postgres -n gdotv --replicas=1
kubectl scale statefulset/gdotv-developer-keycloak-postgres -n gdotv --replicas=1
kubectl scale deployment/gdotv-developer-keycloak -n gdotv --replicas=1
kubectl patch deployment/gdotv-developer -n gdotv \
  --field-manager=gdotv-hostname-detect --type=merge \
  -p '{"spec":{"replicas":1}}'
kubectl patch deployment/gdotv-developer-nginx -n gdotv \
  --field-manager=gdotv-hostname-detect --type=merge \
  -p '{"spec":{"replicas":1}}'
Restart a single service
kubectl rollout restart deployment/gdotv-developer -n gdotv
kubectl rollout restart deployment/gdotv-developer-keycloak -n gdotv
kubectl rollout restart deployment/gdotv-developer-nginx -n gdotv
Watch rollout progress:
kubectl rollout status deployment/gdotv-developer -n gdotvCheck Logs
gdotv application
# Live logs
kubectl logs -f -n gdotv deployment/gdotv-developer

# Logs from the previous (crashed) container
kubectl logs -n gdotv deployment/gdotv-developer --previous
Keycloak
kubectl logs -f -n gdotv deployment/gdotv-developer-keycloaknginx
kubectl logs -f -n gdotv deployment/gdotv-developer-nginxBootstrap job
kubectl get pods -n gdotv -l app.kubernetes.io/component=bootstrap
kubectl logs -n gdotv -l app.kubernetes.io/component=bootstrap
All pods
kubectl get pods -n gdotv -l app.kubernetes.io/instance=gdotv-developerPod events (useful for crash diagnosis)
kubectl describe pod -n gdotv -l app.kubernetes.io/component=gdotv-appScaling
Scale the gdotv application
The gdotv application is stateless (session state is stored in PostgreSQL). It can safely run multiple replicas.
In auto-detect hostname mode (the default), the gdotv-developer Deployment's replica count is owned by the hostname-detect Job. Scale it persistently by rerunning helm upgrade with the Job's replica target:
helm upgrade gdotv-developer \
  oci://709825985650.dkr.ecr.us-east-1.amazonaws.com/gdotv/gdotv-developer \
  --namespace gdotv \
  --reuse-values \
  --wait \
  --set gdotv.hostnameDetect.replicaCount=3
For a one-off scale without rerunning the Job, use kubectl patch with the matching field manager:
kubectl patch deployment/gdotv-developer -n gdotv \
  --field-manager=gdotv-hostname-detect --type=merge \
  -p '{"spec":{"replicas":3}}'
If you have disabled auto-detect mode (gdotv.hostnameDetect.enabled=false), you can use kubectl scale or --set gdotv.replicaCount=3 as expected.
Scale nginx
nginx is stateless and can be scaled freely. As with gdotv, in auto-detect mode the replica count is owned by the hostname-detect Job — use kubectl patch or helm upgrade:
kubectl patch deployment/gdotv-developer-nginx -n gdotv \
  --field-manager=gdotv-hostname-detect --type=merge \
  -p '{"spec":{"replicas":3}}'

# Or persistently:
helm upgrade gdotv-developer \
  oci://709825985650.dkr.ecr.us-east-1.amazonaws.com/gdotv/gdotv-developer \
  --namespace gdotv \
  --reuse-values \
  --wait \
  --set nginx.replicaCount=3
Keycloak and databases
Keycloak and both PostgreSQL instances run as single replicas. Scaling them requires additional configuration (Keycloak clustering, PostgreSQL replication) that is outside the scope of this deployment. For production HA requirements, consider using Amazon RDS for PostgreSQL and a Keycloak Operator.
Cluster-level scaling
If pods cannot be scheduled due to insufficient node resources, scale the EKS managed node group:
aws eks update-nodegroup-config \
  --cluster-name <CLUSTER_NAME> \
  --nodegroup-name <NODEGROUP_NAME> \
  --scaling-config minSize=2,maxSize=10,desiredSize=5 \
  --region <REGION>
AWS: IRSA for Amazon Neptune and other AWS services
To connect gdotv to Amazon Neptune with IAM authentication, or other AWS services, without storing credentials in the cluster, use IAM Roles for Service Accounts (IRSA). The gdotv service account is already annotated with an IAM role during installation (see Step 2 - Create the IRSA role). You can extend that role with additional permissions as needed.
Kubernetes service account
gdotv runs under the following Kubernetes service account:
- Namespace:
gdotv - Service account name:
gdotv-developer
When configuring IAM trust policies manually - for example to grant access to Amazon Neptune or other AWS services - reference this service account as the principal:
system:serviceaccount:gdotv:gdotv-developerAdding Neptune permissions to the existing IRSA role
- Find the role ARN annotated on the gdotv service account:
kubectl get serviceaccount gdotv-developer -n gdotv \
-o jsonpath='{.metadata.annotations.eks\.amazonaws\.com/role-arn}'- Attach an inline policy granting Neptune access (see the policy JSON in Step 3 - Add Amazon Neptune IAM permissions above):
aws iam put-role-policy \
  --role-name <ROLE_NAME> \
  --policy-name gdotv-neptune-access \
--policy-document file://neptune-policy.json- Restart the gdotv pod to pick up the new permissions:
kubectl rollout restart deployment/gdotv-developer -n gdotvUninstalling
To completely remove gdotv from your cluster:
helm uninstall gdotv-developer -n gdotv
kubectl delete namespace gdotv
Note that persistent volumes (PostgreSQL data) are not automatically deleted. To remove them:
kubectl delete pvc --all -n gdotvTo delete the EKS cluster entirely (if it was created by the CloudFormation stack):
aws cloudformation delete-stack --stack-name gdotv --region <REGION>Troubleshooting
The application is not accessible over HTTPS
- Check that the NLB has a hostname assigned:
kubectl get svc -n gdotv - Verify that EKS security group rules allow inbound traffic on port 443
- Check that all pods are running:
kubectl get pods -n gdotv
gdotv pods are in CrashLoopBackOff
This typically indicates a hostname or Keycloak connectivity issue. Check the logs:
kubectl logs -n gdotv deployment/gdotv-developerCommon causes:
- Hostname mismatch between the configured hostname and the actual NLB endpoint
- Keycloak not fully ready when gdotv starts (init containers should handle this, but check events)
The application is stating that AWS Marketplace License Validation failed
License validation failures are caused by missing or incorrect IRSA configuration. Check the following:
- The
gdotv-developerservice account has theeks.amazonaws.com/role-arnannotation:bashkubectl get serviceaccount gdotv-developer -n gdotv -o yaml - The annotated IAM role has the
aws-marketplace:RegisterUsageandaws-marketplace:MeterUsagepermissions - The
AWS_REGIONenvironment variable is set on the gdotv pod:bashkubectl exec -n gdotv deployment/gdotv-developer -- env | grep AWS_REGION - The OIDC provider is correctly associated with the cluster:bash
aws eks describe-cluster --name <CLUSTER_NAME> --region <REGION> \
  --query 'cluster.identity.oidc.issuer'
Pods stuck in Pending state
The cluster may not have sufficient node resources. Check events:
kubectl get events -n gdotv --sort-by='.lastTimestamp' | tail -20If nodes are the issue, scale the node group (see Cluster-level scaling above).
Bootstrap job failed
The bootstrap job creates the initial Keycloak user. If it failed, check its logs:
kubectl logs -n gdotv -l app.kubernetes.io/component=bootstrapYou can re-trigger it by running a Helm upgrade:
helm upgrade gdotv-developer \
  oci://709825985650.dkr.ecr.us-east-1.amazonaws.com/gdotv/gdotv-developer \
  --namespace gdotv \
  --reuse-values
Additional support
For any support queries, email us at support@gdotv.com. Support is free and we answer all queries within one business day.